Recipe of Super Quick Homemade Fluffy Bear Bread 2
Fluffy Bear Bread 2.
Hello everybody, I hope you're having an incredible day today. Today, we're going to make a distinctive dish, fluffy bear bread 2. It is one of my favorites food recipes. For mine, I'm gonna make it a bit tasty. This will be really delicious.
Fluffy Bear Bread 2 is one of the most favored of current trending foods in the world. It's simple, it's quick, it tastes yummy. It is enjoyed by millions daily. They are fine and they look wonderful. Fluffy Bear Bread 2 is something which I have loved my entire life.
To get started with this recipe, we have to prepare a few ingredients. You can cook fluffy bear bread 2 using 6 ingredients and 16 steps. Here is how you cook that.
The ingredients needed to make Fluffy Bear Bread 2:
- {Prepare 148 g of whole milk.
- {Take 200 g of strong flour white or wholemeal.
- {Take 24 g of sugar.
- {Make ready 2.5 g of dry yeast.
- {Make ready 2.5 g of salt.
- {Make ready 16 g of unsalted butter.
Steps to make Fluffy Bear Bread 2:
- Heat the milk in a microwave about 20-30 seconds to make it warm. Or just heat it up in a pan. Please never make it too hot as yeast will die at 60 degrees. Around the temperature of bath would be perfect. If it is too hot, leave it till it becomes warm..
- Add flour, sugar, salt and yeast in a bowl or on board and mix them. Then, add the warm milk. Then, knead by hands for about 10 mins on a board or knead for about 10 mins with a stand mixer using a kneading hook or a bread machine. The time will depend on your machine..
- Knead well here until the dough becomes stretchy and gluten is formed. When gluten is formed, you touch the dough and it doesn't stick to bowl and become one. Also if you stretch it becomes very thin sheet almost see-through it. It should look smook..
- Add chopped or very soft butter and knead further for about 3-5 mins until the dough becomes smooth and not stick to the bowl like the last photo. I should look silky, bouncy and smooth..
- Take the dough out and make it round with the motion on tucking inside at the bottom. It should become smooth like the photos below. It is not smooth, knead it with hand. I usually hit it like a ball and it will become silky and very smooth..
- Cover it with cling film and leave it for 30-40 mins until it becomes about twice. It can take much longer. I put hot water with 36-45℃ beneath like in the photo..
- Test the fermentation with a finger coated by flour. If it is the hole remains, the first fermentation has been done..
- Preheat the oven at 180℃..
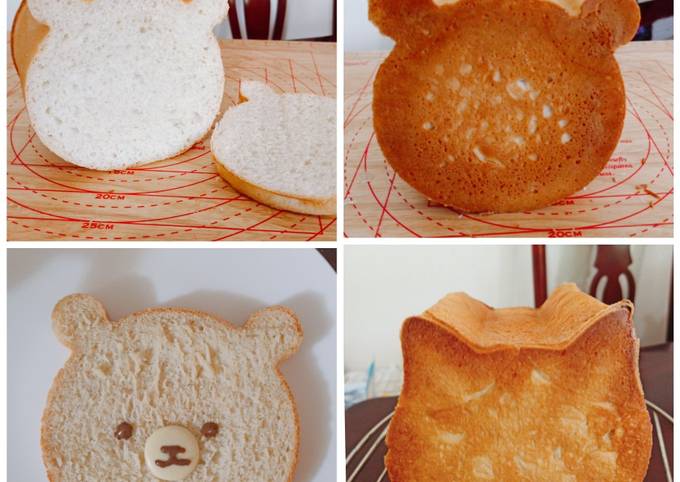
- After having tested the fermentation, take out the dough and punch it down. Make it round again. Take two about 30 g balls which become ears and the rest. And put them bread tin. You can get this cute bear tin at Amazon UK: https://amzn.to/2W3qULk.
- Leave it in a warm place until it expand 80% of the tin. If you would like to eat in the morning, put it in the fridge..
- Put the bread tin with lid in the oven and turn down the temperature as 160℃. Then, bake at 160℃ for about 20 mins. Please make sure you reduce the temperature to 160℃. If you bake it at 180℃, your bread becomes harder. If your oven is powerful enough and it does not go down the temperature when you open, just preheat it as 160℃..
- After having baked about 20 mins, take out the bread from the tin. Leave it cool..
- Done. Children love to draw faces with choco pens..
- I use this choco pen..
- I got a cat bread tin now. So, I can make cat shaped bread as well..
- There is another bear bread recipe of mine at https://cookpad.com/uk/recipes/12351787.
So that is going to wrap this up with this special food fluffy bear bread 2 recipe. Thank you very much for your time. I'm confident that you can make this at home. There's gonna be more interesting food at home recipes coming up. Don't forget to save this page in your browser, and share it to your loved ones, friends and colleague. Thanks again for reading. Go on get cooking!


